Learn how to use Earz in 7 steps/days (teacher)
Introduction
Are you doing the demo or have you just taken out an Earz subscription? Learn how to use Earz by following this step plan.
• You can do 1 ‘step’ every day, but of course you can do it at your own pace.
• The links used in this manual will open in a new browser window (or tab), so this manual will always remain visible.
Step/Day 1: The app
Are you not familiar with Earz yet? Click here for the manual ‘How do we start as a school/organization with Earz?’.
Now try to ‘play’ with the app first. Your students are using the app, so as a teacher it is good to see how it works.
The app is free to download from the app stores or play in the browser.
• Click here for a manual/overview of the app.
• Click here for more information on logging into the app (as a teacher).
Can’t work something out? Visit the help page or send us an e-mail!
Step/Day 2: Additional functions in the app
• If you click on your name (or its first letter) at the top right, the scoreboard opens:
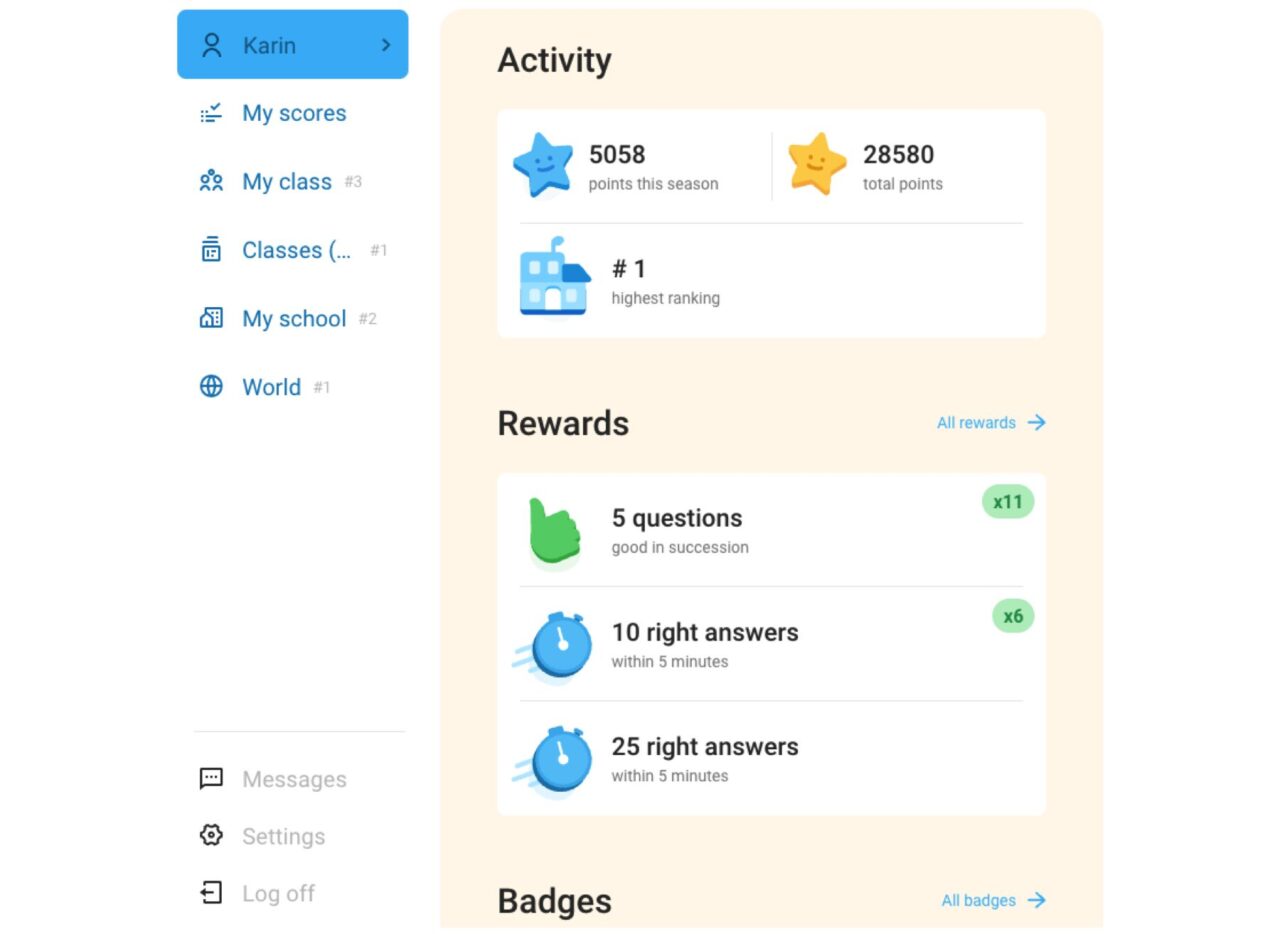
• Clicking Settings at the bottom left of the scoreboard (possibly clicking Account first and then Settings) will take you to the settings window.
Click here to see what you can set here.
• Shown at the top of each game (here Rhythm as an example):
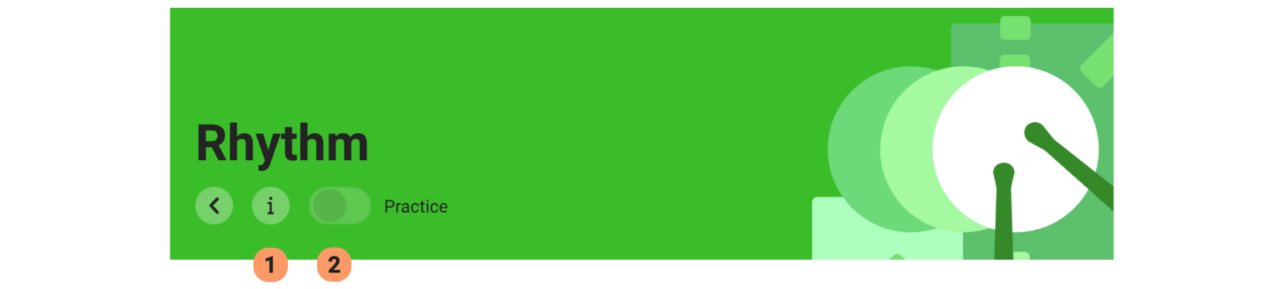
(1) Clicking on the i gives information about the content of the game. Many sections have a link to a relevant wikipedia page.
(2) By turning on Practice, you can play Earz games without scoring points. You can move freely through the levels and play them for as long as you like.
Step/Day 3: The teachers’ page/Student Tracking System
Have you already logged in to the teachers’ page? You received the login details in a separate e-mail when you applied for the demo or the subscription.
Click here for more information about logging in to the teachers’ page.
• In the menu on the left you will see the item Students. Clicking on this item will take you to the Student Tracking System where you can see the results of the students:
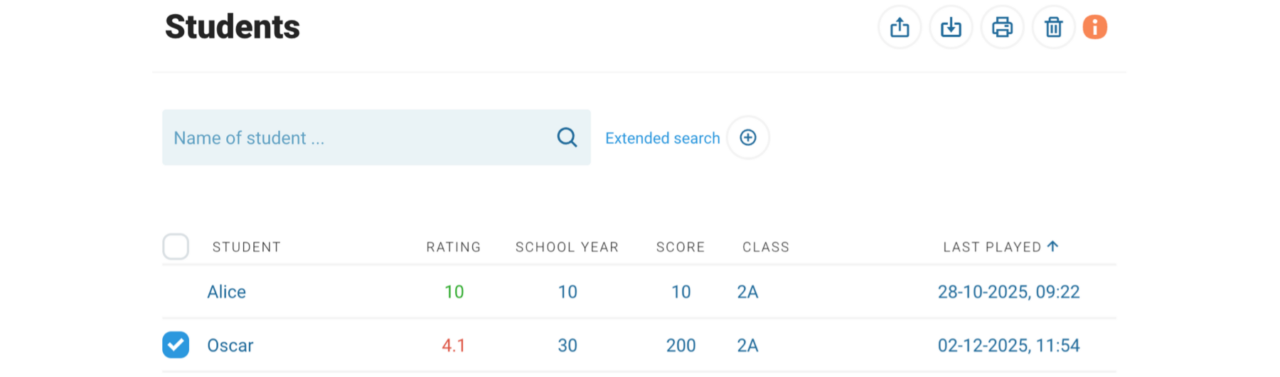
• Students appear here automatically if they have scored at least 1 point in the app.
• Click on the name of a student to see what he/she has done and what the results were.
• Click on any of the games listed to see the results for that student in that game.
Results can be exported to a csv file or printed out.
Step/Day 4: Creating classes and copying games
It is convenient to create classes on the teachers’ page.
• The Student Tracking System becomes more manageable (especially with many students and teachers).
• You can differentiate content on level.
(If you wish, click here for the full manual on classes.)
Creating a (new) class is as follows:
• Click on Classes in the (teachers’ page) menu
• Click on New class
• Fill in a name for the class (e.g. ‘Test class’) and click on Save
If you now log in to the app again, you will see that you can choose from classes in the top left-hand corner, including the one you have just created:

A student logging in for the first time can choose this class immediately upon logging in.
We can now set certain games for this class:
• Click in the (teachers’ page) menu on Earz-Library (this is a library of games created by colleagues).
• Find the game ‘_Demonstration Game (for beginners)’ e.g. by typing ‘_Demonstration’ in the search window.
• Now click on the name of the game and then click on the copy symbol in the top right corner. You now copy this game to your own library.
• Give it a title (e.g. ‘Testgame’) and at Permitted classes select the name of the class you just created (‘Test class’):
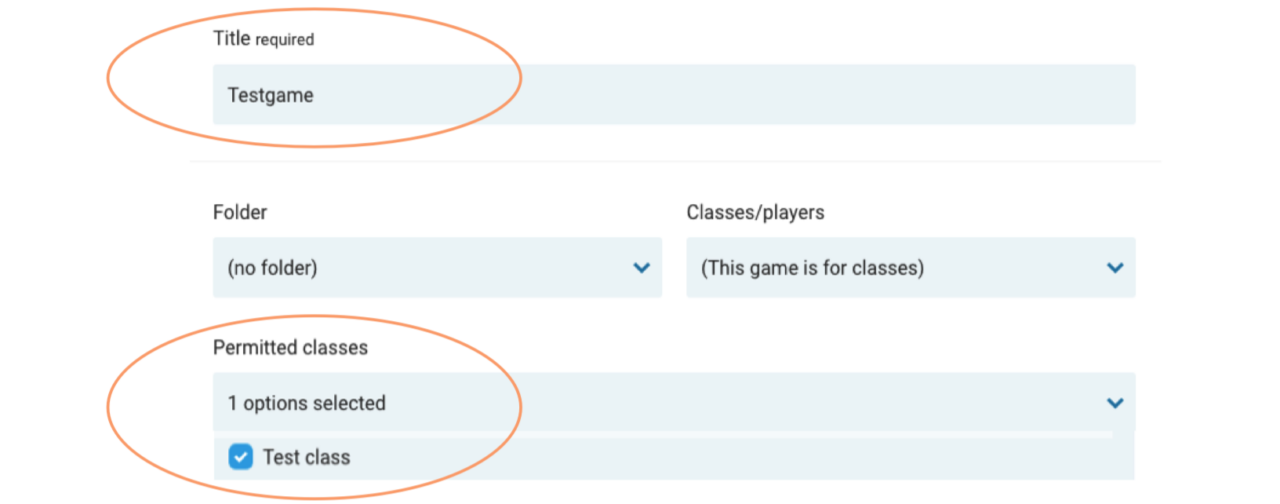
• Now click (top right) on Save.
• Then set (top left) Game Active to Yes.
• Now go back to the app (if you are logged in, log out first and then in again) and you will see the game in question at the top!
You do not see it? Then you probably need to choose the ‘Test class’ first!
Step/Day 5: Make your first own game!
Earz contains many games by default. These are often divided into levels (junior,) beginner, advanced and professional.
Of course, it is much better if the games match the level of your students and your educational goals.
This is possible with Earz, because you can create your own games!
People often think that making Earz games will be very complicated, but that is absolutely not the case! (It has nothing to do with programming or anything like that!)
Make your first own game now with the help of these tutorials:
• Your first own game within minutes (in 10 steps)? Click here !
• Click here for a more extensive manual.
Step/Day 6: Expand your games
Starting from the basis of a copied or own game, you can change and expand your games as desired!
• For all content options, see the overview per module.
• Various additional settings are possible, such as setting it as a test.
• In addition, any game you can:
– place in a folder (for yourself or (also) in the app) (explanation no. 2);
– assign to a class or individual students (explanation no. 3 and 4);
– provide with a description of the game for yourself and/or colleagues (explanation no. 2).
• Furthermore, you can provide your games (or levels!) with an extensive start and/or end message, possibly including images, YouTube clips etc. (explanation nos. 3 and 4).
Such an extensive start message gives you the opportunity to explain something to the student before he/she starts playing the game (or level):
Try it out:
• In Our games, click on the name of your game and then click on the pen symbol in the top right-hand corner.
• In the Start message field, type (e.g.) the text ‘Good luck!

• Now click upper right on Save and then on the Preview symbol upper right.
Step/Day 7: The quiz module
The Quiz module allows you to create your own questions and add your own images, sounds and even YouTube videos!
The possibilities are endless, also because there are different ways of asking questions:
• multiple choice text, images or audio;
• putting text (see image below), images or sounds in the right order;
• open questions.

Now create your first game with your own questions; see the manual here (‘step by step your first own game’) and then choose the Quiz module (instead of Instruments) at step 5.
Click here for an explanation of the quiz module.
If you use both the quiz module and the other modules within a game (or level) (and provide these with start and end messages) you can create very varied and complete games!